Summary
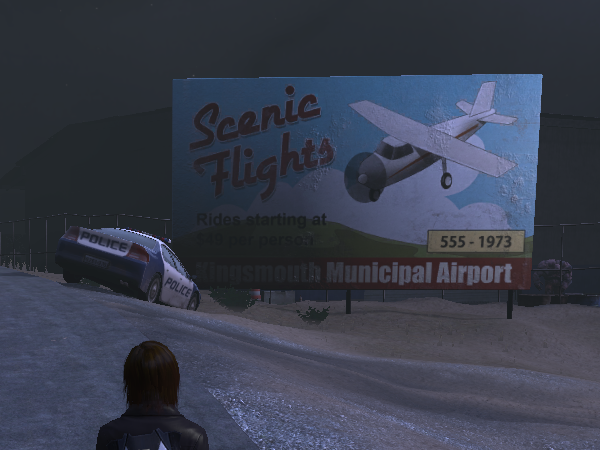
The Kingsmouth Lair is located in the North-East corner of the playfield, beyond the edge of the airport.
By completing all the missions in this lair with your team, you will get your hands on Essences to enable you to spawn bosses. As explained in our Introduction to Lairs - spawning and successfully killing these bosses is how you get your hands on loot!
Notes for this area:
Within this lair, it is incredible the amount of extra adds you can get - mainly because they often seem to come out of nowhere with no visual indication. If you look a bit closer you will see flies hovering over the sand and this indicates the spawning point of the Keelhauleds out of the sand.
As with all lairs, remember you are working in a team. Wait for your team mates if they die, always remember to run back if you die in Anima Form, communicate if you are missing something in order to complete a mission and most importantly - have fun together!
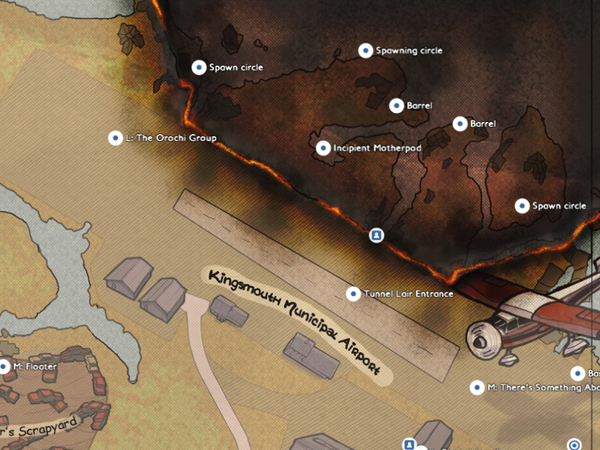
Location overview map:
Missions
As in all lairs, there are 3 missions for you to complete. Ensure you pick all 3 missions up at the start of the lair so that your mission status progresses as you work through the lair with your team.
Mission 1: Unto the Beach
The vile red seaweed is slowly encroaching on Fletcher's Strand, it's fleshy coils stinking in the humid air, bringing savage and ancient draug with it. In turn, the draug and their zombie slaves cultivate the weed's monstrouse colonies. Eliminate the defenders to slow its advance.
Tier 1 of 1:
- Kill 5 Helrisen Leidangr
- Kill 3 Helrisen Volva
- Kill 5 Helrisen Hird
- Kill 3 Helrisen Seidkona
- Kill 10 Keelhauled
Mission 2: Coralations
This beach is a hotspot of mysterious activity. It serves as an access point for the red seaweed, as well as for the creatures that come with it. Collect and burn this mutated algae before it chokes all life out of the shores.
Tier 1 of 2
- Collect 25 clumps of red sargassum.
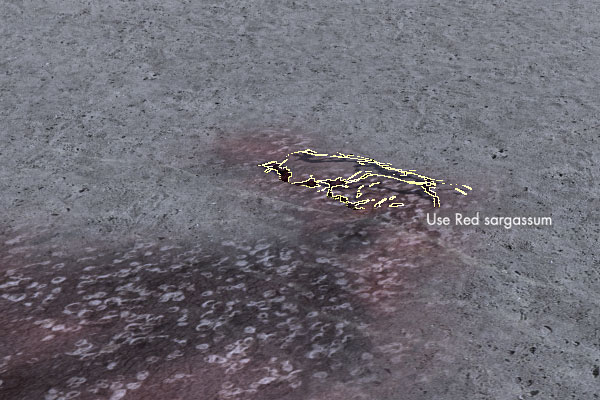
You are likely to find it scattered all over the sandy areas, just watch out for flies near by so you don't get unexpected adds popping!
Tier 2 of 2
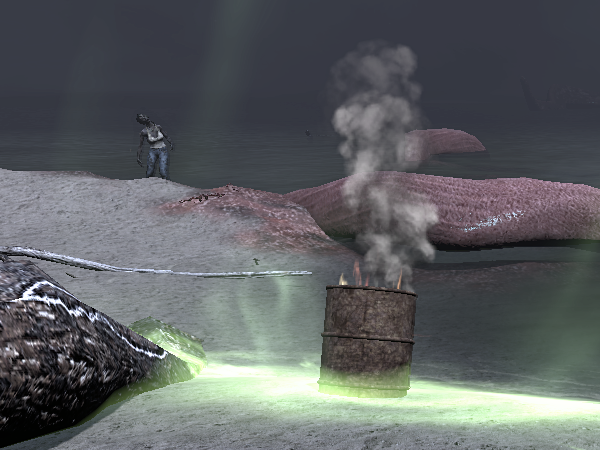
- Set the sargassum on fire in a barrel
If you refer to the map at the start of this guide, you should see a barrel marked at coordinates: 930 x 920 or 887 x 931. There are a few more over the map, but these are the ones we use! Go to the barrel, click it (F) and then back away from it because it's about to get stinky.
Mission 3: The Last Strand
The draug are cultivating a new breed of motherpod to accelerate the spread of the red sargassum. However, the incipient mother requires constant feeding to survive. Hold back the feeders and watch it die. The red sargassum barrel, from Coralations, is recommended for this mission.
Tier 1 of 1
When your team head towards the Incipient Motherpod the mission will trigger. The motherpod needs mobs to reach it to keep itself fed and aid its survival. Therefore it is your mission to stop them getting there.
Generally, adding health gear and killing the incoming mobs slowly with your team well spaced out to hold off the adds works really quite efficiently.
Summoning lair bosses:
Once missions are complete and handed in, each team memeber will have three summoning essences in their inventory. The lair team should then head to one of the summoning platforms. Read more about the Kingsmouth lair bosses in the links below.
 Subscribe to RSS Feed